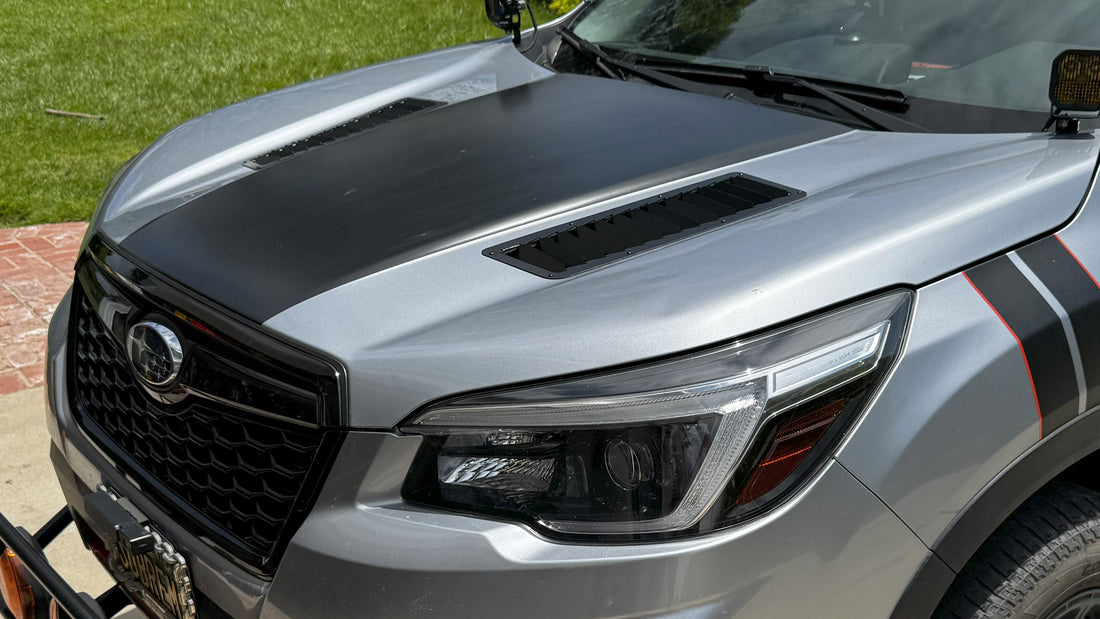
Subaru Forester Hood Louver Installation
Thank you for choosing Spiked Performance!
This Hood Louver kit is a DIY product, and although cutting into your car can be scary, it's a fairly simple job. Just remember to take your time, and cut with the most precision possible. We are not responsible for any damage to your vehicle or this product during the installation process or after. If you do not feel comfortable, please consider professional assembly.
Your Spiked Performance Hood Louver kit includes:
- Hood Louver set
- 1/8th Rivets
- Vinyl Cut template
Tools needed:
- Icy cold beverage
- Angle Grinder with cut disc or Jig Saw
- Drill & 1/8″ drill bit
- Rivet Gun
- File
- Masking tape
- Measuring tape
Make sure to wear protective equipment! Long sleeve shirt, eye protection, and ear protection are all recommended!
Optional Step 1: Remove the hood.
I originally planed on doing this job with the hood mounted. However, with a lifted rig it was difficult to reach where I needed to cut. Removing the hood took an extra 5 minutes, and it was light enough for me to lift without help. I recommend removing the hood, and it would definitely be safer to get a 2nd set of hands to move the hood.
Step 1: Install Cut Template
Measure 10.5 inches from the top of the hood, to the top of the hood vent at the points indicated in the photo below. Then line up the vent by evenly spacing the template 1.75" from the raised hood line along the outer side.

Now it's time to remove the sticker backing. You want the template to stay in position, but you also need to be able to lift it up. To do this, simply lay tape across the top of the template like the image below. Remove any other masking tape holding the template in place. Lift the front of the template up and gently peel the backing off and discard it.

Carefully lay the decal down, and use a credit card to smooth it out. Then remove the transfer tape.

Repeat this on both sides of the hood.
Step 2: Protect the Paint
Tape some newspaper or whatever you have handy to cover all areas of the hood you aren't cutting. This is to protect the paint, so if you don't care about your paint you can skip this step.

Step 3: Cut the openings.
Take a deep breath and cut out the holes. You can use a jig saw or angle grinder with a cut disc. I've used both, and prefer the angle grinder. That said, the angle grinder is dangerous to use, and should only be done with proper protective equipment. You will need to cut through the hood skin and some of the bracing. If your cut disc is not tall enough, you might need to flip the hood upside down to reach some of the bracing.
Warning: Take your time. Do this in sections, and give your hood a chance to cool between cuts. If it over heats you'll melt the vinyl, and it can start to damage your paint. Most of this will be covered by the overlap of the louvers, but it's best to be cautious.
This is a good time to sip your icy cold beverage between cuts.

Slide the louver into place and fine trim any area that's contacting. This is a great time to clean up the edges with a file or Dremel if you have one.
You can now remove the cut templates, tape, and paint protectant.
Step 5: Drill the mounting holes
Start by only drilling one corner hole. Drill through the louver and the hood together. Stick a rivet in this hole to hold the louver in place. *Do not actually install the rivet, you are just placing it in the hole.
Line up a hole on the opposite end. Example; you drilled the bottom left hole, so line up the top right. Drill out that hole and out a rivet in place.
Drill the remaining holes through the Louver an hood together. This insures perfect alignment.

Step 6: Install the Pop Rivets
Remove the cut template, and then use your rivet gun to install the rivets.
Optional Step 7: Reinstall the hood.
If you removed the hood, you're going to need to put it back now.

That's it! Congratulations on your new hood louvers!
Email us hello@spikedperformance.com if you have any questions.
